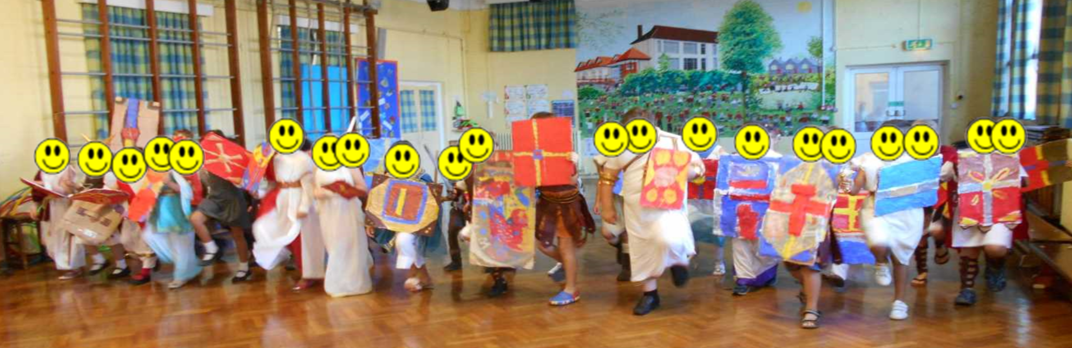
As I have previously mentioned, our unit last half-term was "I Am Warrior" which looked closely at the Romans (and the Celts to a lesser degree).
We took it upon ourselves to design and create our own scutum (shield). In an effort to have some uniformity, we ended up limiting the children to using primary colours (red, blue and yellow) but they could also use some metallic paint at the very end to add extra detail.
Equipment
Cardboard
Strong scissors
Red, blue and yellow paint
Glue gun to glue on shield handle
Metallic paint
Glue
Step 1
Having designed their shields in their sketchbooks, the children used cardboard they had brought in to create their basic shape. They cut out the outline for their shield and then cut out and glued shapes on top of this to create more of a 3D shape and emphasise certain parts of their shield as shown below:
We showed the children how to use the smaller shape they had cut out as a stencil. They could then keep gluing the same shape on top of eachother to dramatically raise the level and make it even more 3D.
Step 2
Each table had a large bowl of a 50% water/50% pva glue solution. Children then had to dip thin strips of scrap paper into this solution and stick it smoothly across the entire shield until it was covered. This is a papier-mache technique that I find isn't quite as messy as some alternative methods. When it's dry it's nice and solid!
Step 3
When it is completely dry, you can use the primary colours to paint your shield. Start off with the base layer and then paint on top when it is dry for the best results. At the very end, you can add extra details using metallic paint.
We were very pleased with the results and the great colours and designs. Next time, we'll probably try and push for more variety in their shapes but it was a fantastic first effort.
At the end of the unit we had our Roman Day and the shields had a good outing being used for marching and battle reenactments.
Well done, 4B!
DB.
I'm a primary (elementary) teacher who runs an after-school art club. This blog records all of my art activities with instructions and examples of work that my club produces. I also post artwork from my usual class.
Sunday, 9 November 2014
Long Absence!
It's been quite a few weeks since my last post about all of the changes that I was making to my classroom over the Summer as I was moving up to year 4. I've had very little time to update this blog with new art activities being done in my classroom but the plan is to try and get back up to date over the next week or so.
We just finished our unit "I Am Warrior" which lasted all of half-term and was mainly focused on the Romans. We created our own shields, Roman coins, mosaics, clay Roman god/goddess statues and pictures of Boudicca. These will hopefully be made available to you in the very near future.
Due to the massive overhaul of the curriculum, I unfortunately currently do not have the time to run my weekly art club. The plan is to continue with this either next term or during the Summer when things have hopefully quietened down a tad.
This blog is almost nearing 1,000 views which is incredible. There have been visitors from Australia, Denmark, Israel, Russia, Ukraine and even Saudi Arabia. I'm so pleased that the hard work of children in my 'home class' and art club has attracted so many people to come and browse. Thank you anyone and everyone who has visited Bricks and Wood and followed my Pinterest which also has hundreds of art activities and ideas.
DB.
We just finished our unit "I Am Warrior" which lasted all of half-term and was mainly focused on the Romans. We created our own shields, Roman coins, mosaics, clay Roman god/goddess statues and pictures of Boudicca. These will hopefully be made available to you in the very near future.
Due to the massive overhaul of the curriculum, I unfortunately currently do not have the time to run my weekly art club. The plan is to continue with this either next term or during the Summer when things have hopefully quietened down a tad.
This blog is almost nearing 1,000 views which is incredible. There have been visitors from Australia, Denmark, Israel, Russia, Ukraine and even Saudi Arabia. I'm so pleased that the hard work of children in my 'home class' and art club has attracted so many people to come and browse. Thank you anyone and everyone who has visited Bricks and Wood and followed my Pinterest which also has hundreds of art activities and ideas.
DB.
Saturday, 30 August 2014
A Thank You to 3B
We're coming to the end of the summer holidays and I'd just like to say thank you to all of the children and parents of 3B who have made this is a great first year at the school for me. I'm looking forward to my new challenge of moving up to year 4 with 4B and taking on the role of Art Coordinator.
I'd also just like to thank everyone for such lovely cards and gifts. They really mean a lot and I was incredibly humbled by everybody's kindness.
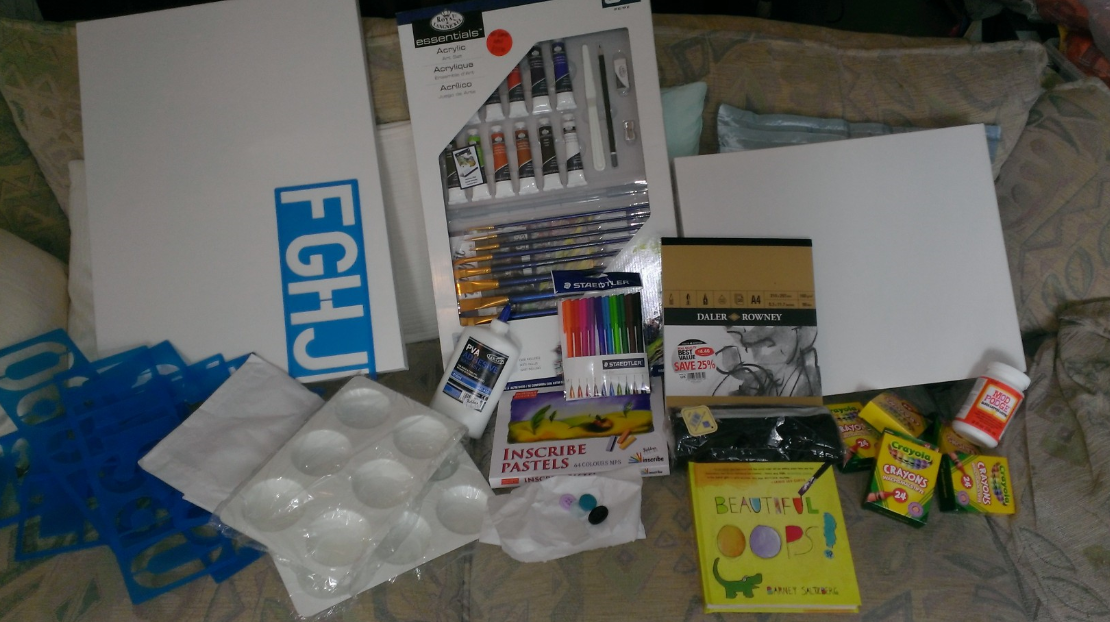
A huge thank you must also go to the group of parents who generously treated me with vouchers to a local art shop (Fielders, in Wimbledon). This was an incredibly generous and thoughtful gift and is hugely appreciated. I managed to get down to the shop over the holidays and thought I'd leave a picture here of some of the goodies that I purchased. Some of these have already been used for new classroom decorations!
Thank you once again and I wish everyone a fantastic new academic year.
DB.
I'd also just like to thank everyone for such lovely cards and gifts. They really mean a lot and I was incredibly humbled by everybody's kindness.
A huge thank you must also go to the group of parents who generously treated me with vouchers to a local art shop (Fielders, in Wimbledon). This was an incredibly generous and thoughtful gift and is hugely appreciated. I managed to get down to the shop over the holidays and thought I'd leave a picture here of some of the goodies that I purchased. Some of these have already been used for new classroom decorations!
Thank you once again and I wish everyone a fantastic new academic year.
DB.
Monday, 11 August 2014
New Year, New Classroom
Next academic year I will be moving from Year 3 into Year 4 which has involved moving all of my things upstairs to a new classroom. I saw it as a good opportunity to freshen things up a bit and try some new ideas. Many of the teacher blogs I follow often share their classrooms so I thought I'd join the club. Enjoy the pictures!
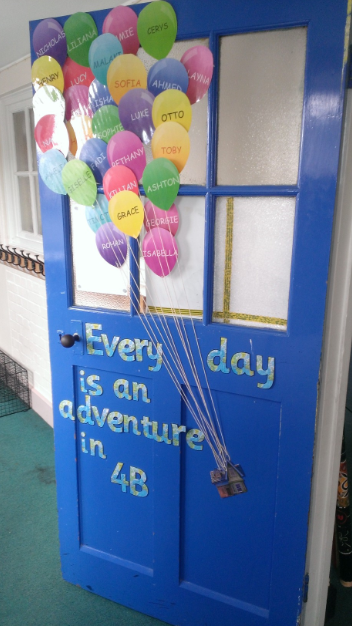
This is the inside of my classroom door. Hopefully it'll inspire the children a bit and they'll look forward to coming in every day. I saw a similar idea here.
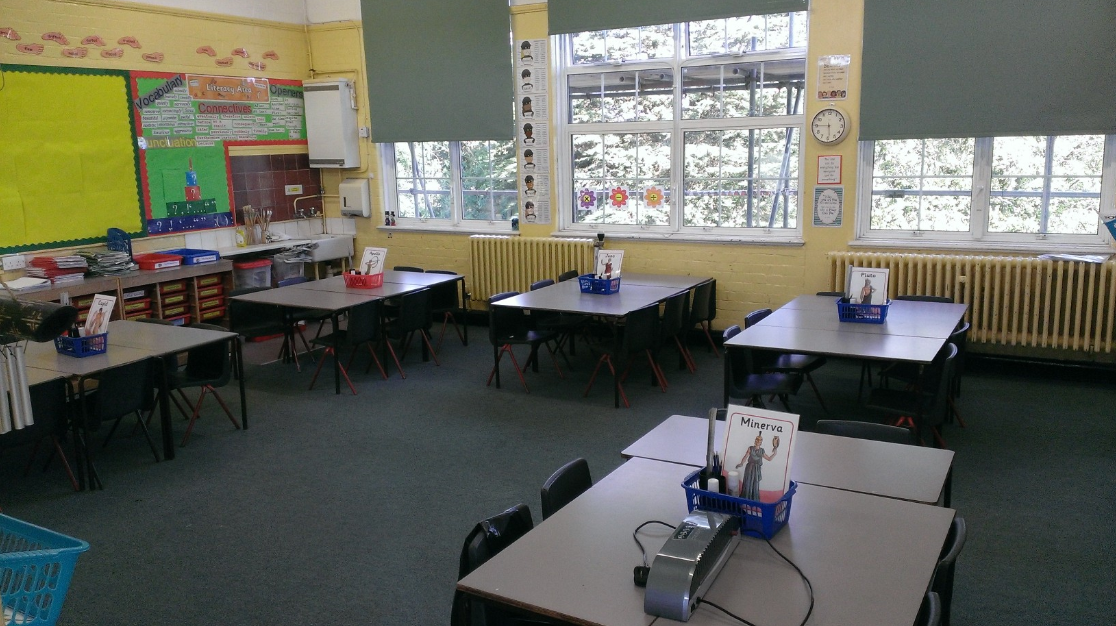
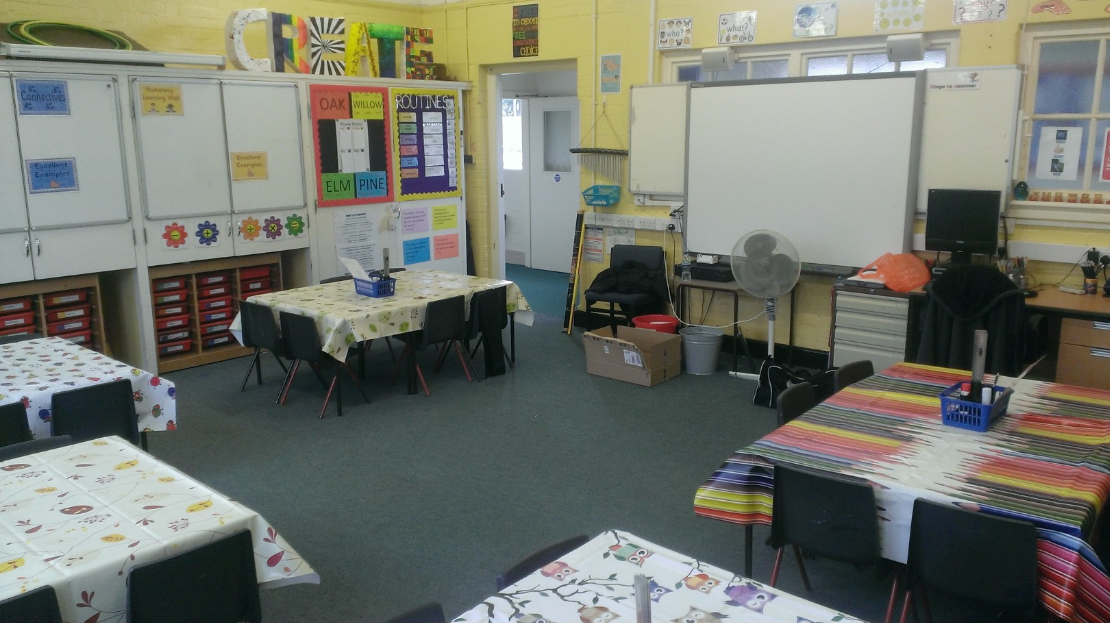
This is the class looking in from the doorway. Our first unit in September will be "I Am Warrior" with a focus on the Romans so the table names are going to be Roman Gods. You can also see some "criminal words" at the back of the class that the children should try to avoid in their writing (such as 'said') and offers better alternatives. The literacy area focuses on VCOP (vocabulary, connectives, openers and punctuation) which will hopefully support their writing.
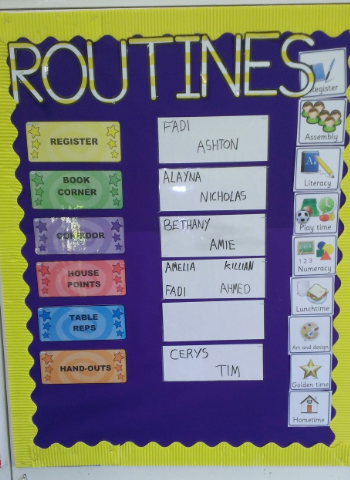
My new routine board has a clear visual timetable on one side and a list of monitors on the other. I'll work my way through each of the jobs in register order for easiness.
We're starting a new house system next year and this board will be used to count house-points. I laminated coloured paper for each house and used a permanent gold marker to write the names of the children in each house.
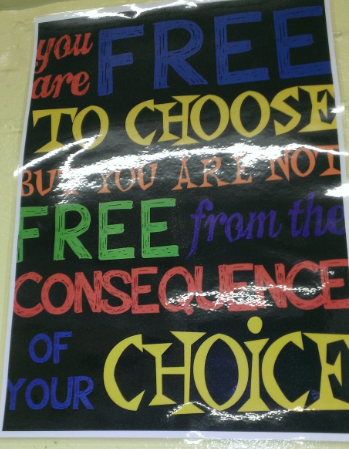
This sign is above the door and I'm sure I'll be referring to it at numerous times throughout the year. It's a very clear message and will support our new behaviour policy.
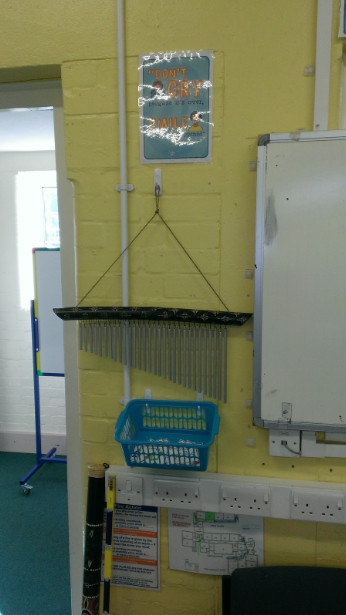
I used some really useful sticky hooks to hang some things in my classroom to provide extra storage. I keep my spare subject squares for my visual timetable in the basket and my chimes are used if the class are being too noisy for my liking.
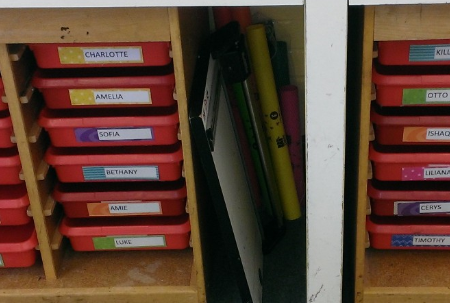
Each child has their own tray like these with their name on. They can keep extra stationery, reading books etc in here. They're responsible for keeping it neat and tidy!
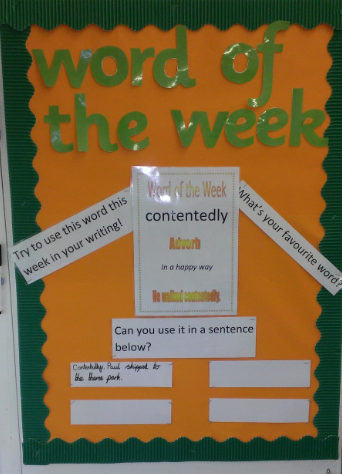
My "Word of the Week" board. I had thought about something like this last year but didn't get the time to make it. I've created about 40 word sheets, all laminated, with a new word/example etc so I'm fully prepared for this year. I've got laminated sections at the bottom of the board where students will be encouraged to have a go at using the word in a sentence. I might even throw in a little reward (like house-points) if a pupil can use the word that week in their writing.
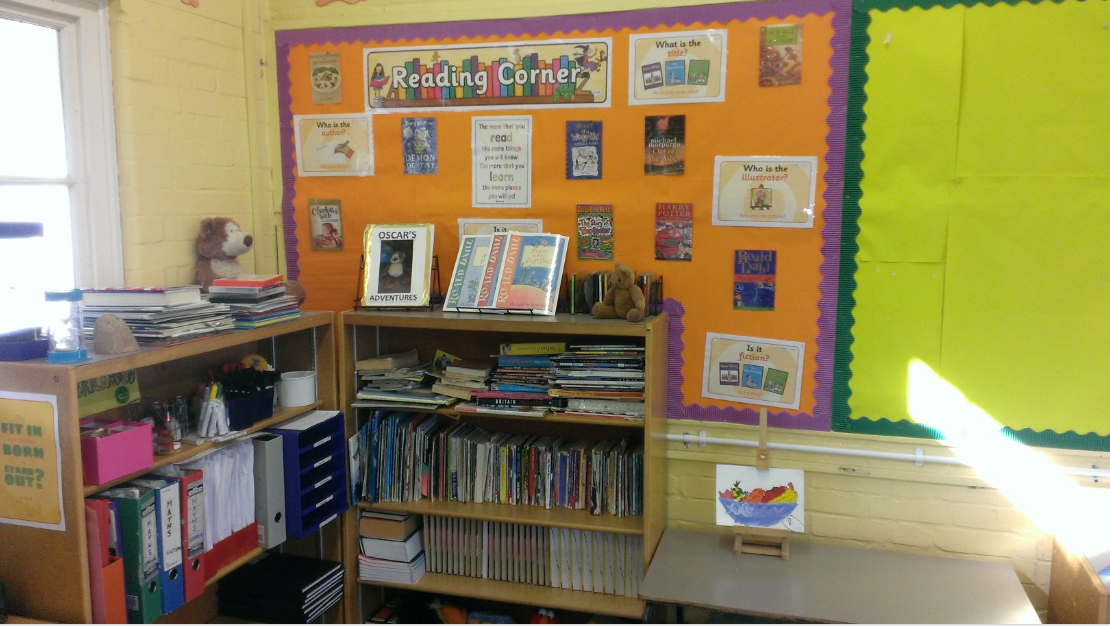
Here's the reading corner. Admittedly, the shelves themselves need a bit of a tidy-up but they're on their way. You may also notice Oscar the bear and his "Oscar's Adventures" book. This book was created by my class last year. Each week, a different child would take Oscar home and record what activities they did and either draw or stick in a picture. It was very popular and I'm going to attempt to do a similar but more grown-up version of the task this year. The mini-easel is going to be used to display artwork that I've been really impressed by.
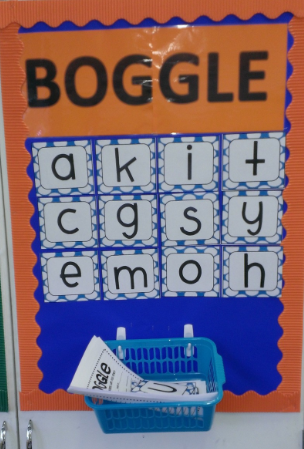
Boggle Board! I came across this idea here and thought it would fit my classroom well. The children use the letters displayed to try and make as many words as possible in that week and they record them on the boggle sheets kept in the basket (those handy hooks again!). I'll change the letters each week and hopefully this will become a really engaging, interactive display.
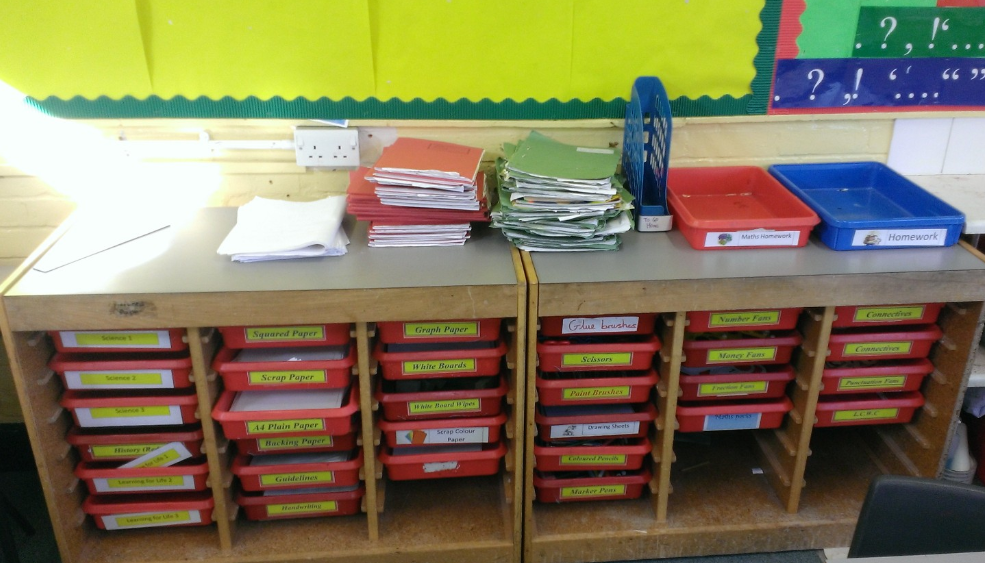
Bit untidy at the moment as I'm still replacing some of the older labels, but I'm lucky that I've got so much storage for these trays for all sorts of things. I've also got space now for all of my homework, maths homework and letters/books that need to be sent home.
I thought I'd create this folder to have a very clear record of times when homework is missing/forgotten. Each child has a sheet with their name on in the folder and they must record the date, title of homework and give a reason for why there homework was not handed in on time. Hopefully this will also encourage the students to understand responsibility. I came across this idea here.
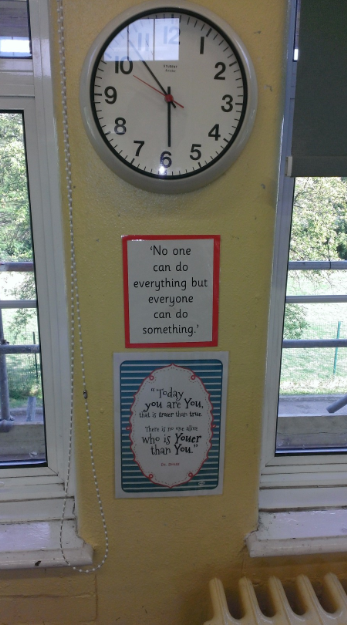
I've got lots of Dr Seuss quotes stuck around the classroom .
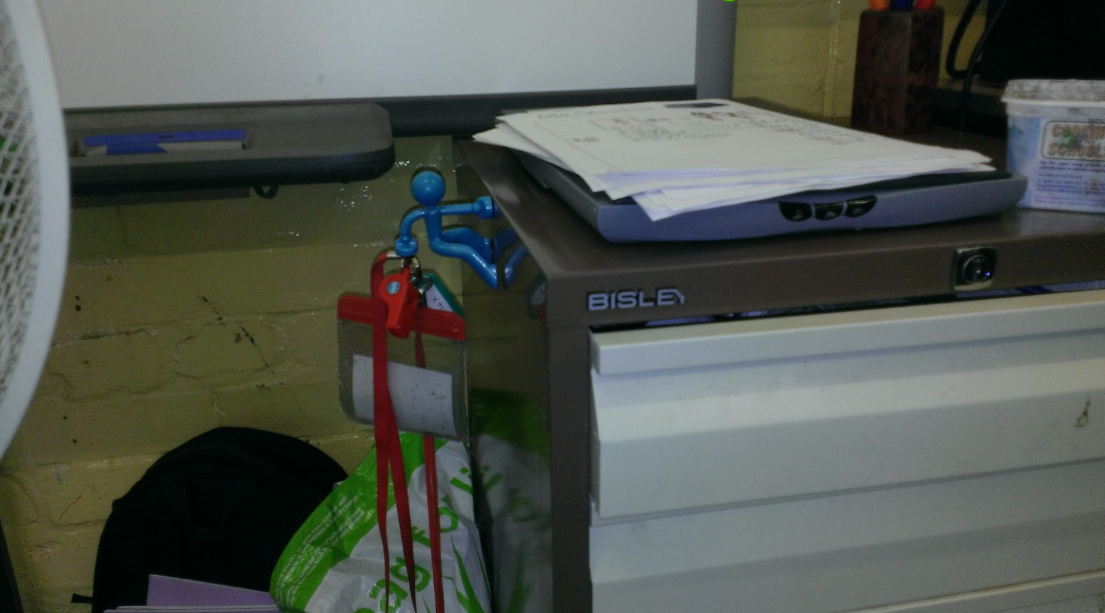
This is my magnetic buddy Keith who hangs around on the filing cabinet. He's going to keep important things like my school teacher I.D., whistle and P.E. key safe and easily obtainable.
Here's a poem I found called "What is a teacher?" that I enjoyed reading. It's quite fun and I thought some of the children might like it. The other side has some of my favourite quotes about education.
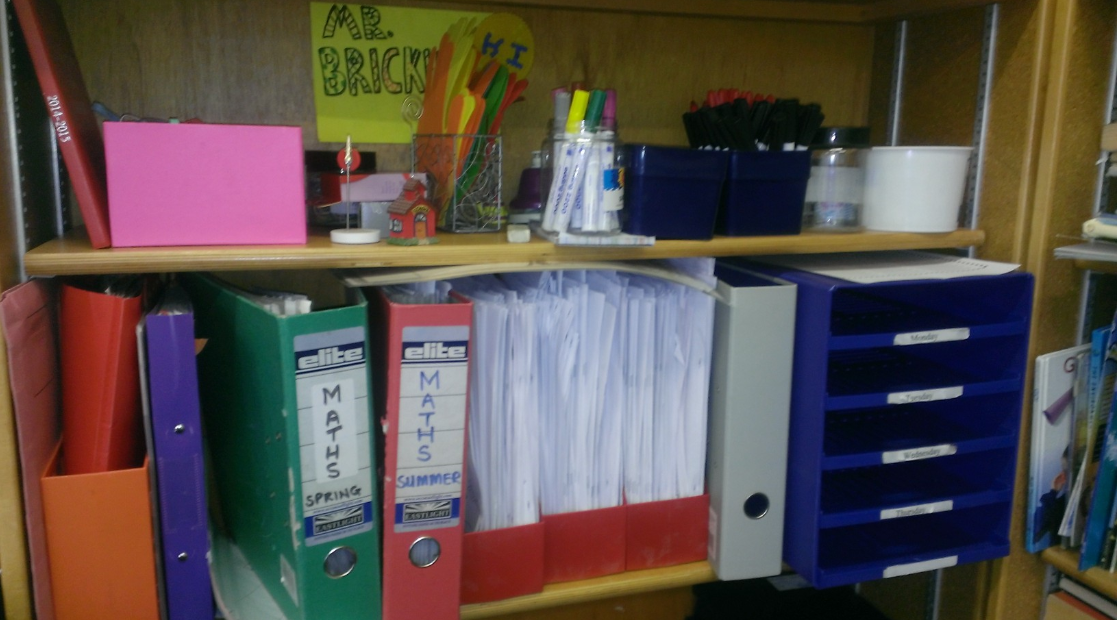
These are my main shelves next to my desk. I've got my plans, key resources and daily trays here to stay organised. The top shelf has other important things like pens, spare glue lids, markers, sharpeners etc. It also has lots of coloured hand cutouts as I will occasionally send home a "High Five" to congratulate a child for a piece of work or improved behaviour.
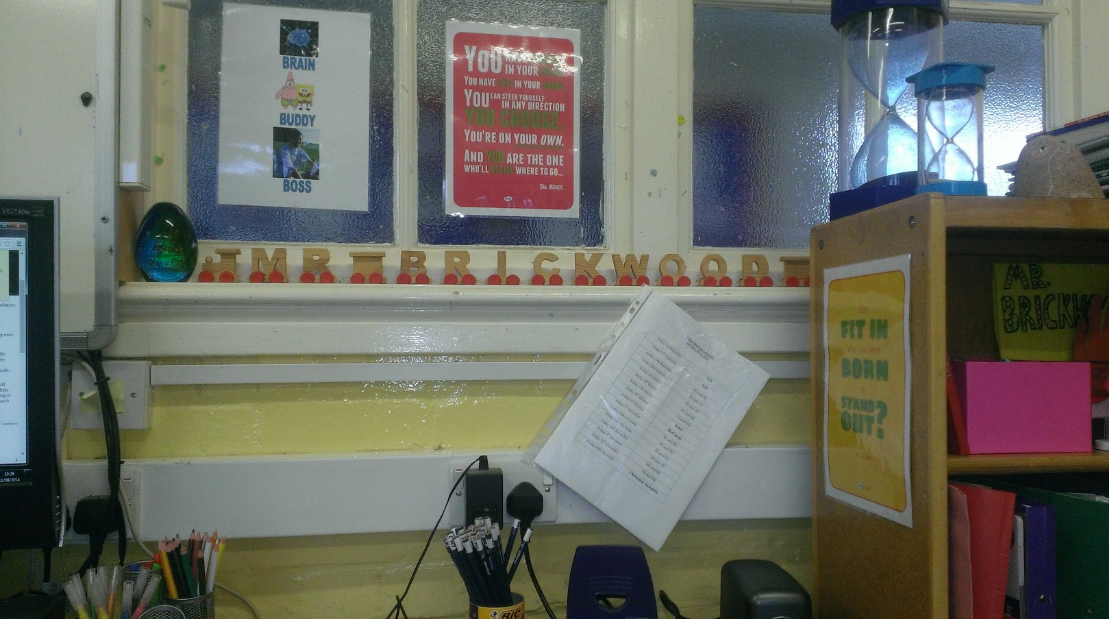
Over to my desk, I've for the Brain, Buddy, Boss system to aid focus. There are also a couple of other Dr Seuss quotes and my Mr Brickwood train some friends got me to wish me luck for my first year of teaching.
Being the school's new art coordinator and leading the Art Club, there's going to be lots of mess in my classroom. I bought these brilliant table covers online and hopefully they'll last a good amount of time. It saves so much effort and time compared to laying out newspaper that gets destroyed. I went for a bit of a mixture with coloured pencils, cute owls, friendly cows and a couple of floral designs.
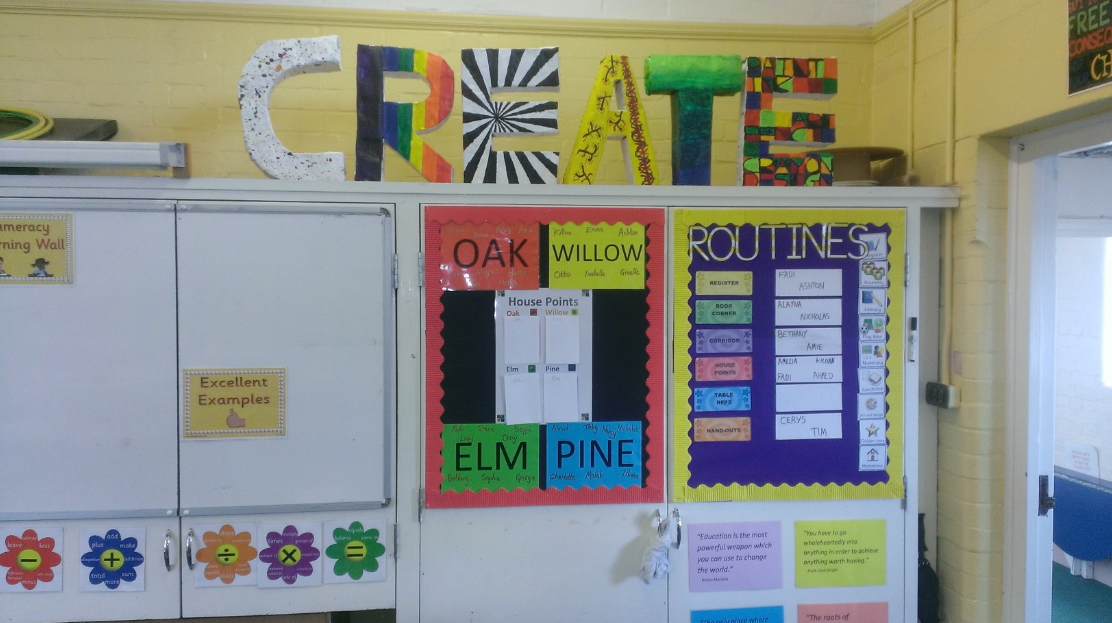
Here you can see my CREATE 3D letters that I feel brighten up the classroom and will hopefully further inspire and motivate the children to create not just in art but with their words, too. I used the same method as used in our art project.I tried making each letter something different to do with art. The C is inspired by Jackson Pollock's paint spattering, R is the rainbow colours, E has an optical illusion to show perspective and how art can take different forms, A takes some inspiration from Klimt with his swirls on The Tree of Life, T shows tints and gradients and the final E is inspired by Paul Klee. You can also see the whiteboards there that will be used for Literacy and Numeracy working walls.
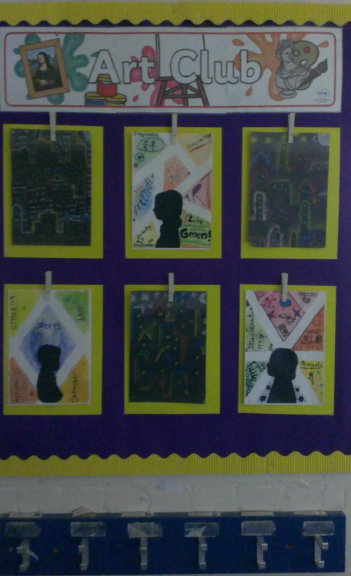
And here's the new Art Club display in one of the main hallways. I've sacrificed some space so unfortunately I can't squeeze as many pieces onto the board, but it looks much neater and with the hot-glued clothes pegs on, I can easily and quickly transfer new pieces of art without hassle.
So there you have it, that is my new classroom. I've put a lot of time into it and am very pleased with the final result. Let's hope the kids are, too...
DB.
This is the inside of my classroom door. Hopefully it'll inspire the children a bit and they'll look forward to coming in every day. I saw a similar idea here.
This is the class looking in from the doorway. Our first unit in September will be "I Am Warrior" with a focus on the Romans so the table names are going to be Roman Gods. You can also see some "criminal words" at the back of the class that the children should try to avoid in their writing (such as 'said') and offers better alternatives. The literacy area focuses on VCOP (vocabulary, connectives, openers and punctuation) which will hopefully support their writing.
My new routine board has a clear visual timetable on one side and a list of monitors on the other. I'll work my way through each of the jobs in register order for easiness.
We're starting a new house system next year and this board will be used to count house-points. I laminated coloured paper for each house and used a permanent gold marker to write the names of the children in each house.
This sign is above the door and I'm sure I'll be referring to it at numerous times throughout the year. It's a very clear message and will support our new behaviour policy.
I used some really useful sticky hooks to hang some things in my classroom to provide extra storage. I keep my spare subject squares for my visual timetable in the basket and my chimes are used if the class are being too noisy for my liking.
Each child has their own tray like these with their name on. They can keep extra stationery, reading books etc in here. They're responsible for keeping it neat and tidy!
My "Word of the Week" board. I had thought about something like this last year but didn't get the time to make it. I've created about 40 word sheets, all laminated, with a new word/example etc so I'm fully prepared for this year. I've got laminated sections at the bottom of the board where students will be encouraged to have a go at using the word in a sentence. I might even throw in a little reward (like house-points) if a pupil can use the word that week in their writing.
Here's the reading corner. Admittedly, the shelves themselves need a bit of a tidy-up but they're on their way. You may also notice Oscar the bear and his "Oscar's Adventures" book. This book was created by my class last year. Each week, a different child would take Oscar home and record what activities they did and either draw or stick in a picture. It was very popular and I'm going to attempt to do a similar but more grown-up version of the task this year. The mini-easel is going to be used to display artwork that I've been really impressed by.
Boggle Board! I came across this idea here and thought it would fit my classroom well. The children use the letters displayed to try and make as many words as possible in that week and they record them on the boggle sheets kept in the basket (those handy hooks again!). I'll change the letters each week and hopefully this will become a really engaging, interactive display.
Bit untidy at the moment as I'm still replacing some of the older labels, but I'm lucky that I've got so much storage for these trays for all sorts of things. I've also got space now for all of my homework, maths homework and letters/books that need to be sent home.
I thought I'd create this folder to have a very clear record of times when homework is missing/forgotten. Each child has a sheet with their name on in the folder and they must record the date, title of homework and give a reason for why there homework was not handed in on time. Hopefully this will also encourage the students to understand responsibility. I came across this idea here.
I've got lots of Dr Seuss quotes stuck around the classroom .
This is my magnetic buddy Keith who hangs around on the filing cabinet. He's going to keep important things like my school teacher I.D., whistle and P.E. key safe and easily obtainable.
Here's a poem I found called "What is a teacher?" that I enjoyed reading. It's quite fun and I thought some of the children might like it. The other side has some of my favourite quotes about education.
These are my main shelves next to my desk. I've got my plans, key resources and daily trays here to stay organised. The top shelf has other important things like pens, spare glue lids, markers, sharpeners etc. It also has lots of coloured hand cutouts as I will occasionally send home a "High Five" to congratulate a child for a piece of work or improved behaviour.
Over to my desk, I've for the Brain, Buddy, Boss system to aid focus. There are also a couple of other Dr Seuss quotes and my Mr Brickwood train some friends got me to wish me luck for my first year of teaching.
Being the school's new art coordinator and leading the Art Club, there's going to be lots of mess in my classroom. I bought these brilliant table covers online and hopefully they'll last a good amount of time. It saves so much effort and time compared to laying out newspaper that gets destroyed. I went for a bit of a mixture with coloured pencils, cute owls, friendly cows and a couple of floral designs.
Here you can see my CREATE 3D letters that I feel brighten up the classroom and will hopefully further inspire and motivate the children to create not just in art but with their words, too. I used the same method as used in our art project.I tried making each letter something different to do with art. The C is inspired by Jackson Pollock's paint spattering, R is the rainbow colours, E has an optical illusion to show perspective and how art can take different forms, A takes some inspiration from Klimt with his swirls on The Tree of Life, T shows tints and gradients and the final E is inspired by Paul Klee. You can also see the whiteboards there that will be used for Literacy and Numeracy working walls.
And here's the new Art Club display in one of the main hallways. I've sacrificed some space so unfortunately I can't squeeze as many pieces onto the board, but it looks much neater and with the hot-glued clothes pegs on, I can easily and quickly transfer new pieces of art without hassle.
So there you have it, that is my new classroom. I've put a lot of time into it and am very pleased with the final result. Let's hope the kids are, too...
DB.
Wednesday, 23 July 2014
Art Gallery
It's my first year at my current school and there hasn't been an art co-ordinator so I've stepped into the role informally over the past couple of months and will be taking it officially from September next school year.
I thought it would be a nice way to finish the year by having a mini celebration of artwork that had been taking place in my classroom. During lunchtime, many children and staff came in and browsed with enthusiasm which was lovely to see. After school, many parents of children in my art club came to look. It was great to have their support!
On display was all of the work from my art club over the past half-term, the 3D letters from the activity afternoons and some artwork that my usual class had completed. Although on a small scale, the exhibition was a great success. Hopefully in the future it can be more of a celebration of the whole school in the main hall.
Thanks to children, staff and parents who came along.
DB.
I thought it would be a nice way to finish the year by having a mini celebration of artwork that had been taking place in my classroom. During lunchtime, many children and staff came in and browsed with enthusiasm which was lovely to see. After school, many parents of children in my art club came to look. It was great to have their support!
On display was all of the work from my art club over the past half-term, the 3D letters from the activity afternoons and some artwork that my usual class had completed. Although on a small scale, the exhibition was a great success. Hopefully in the future it can be more of a celebration of the whole school in the main hall.
Thanks to children, staff and parents who came along.
DB.
Art Activity Afternoon Project- 3D Letters
For the last 3 weeks of the year, children get to opt into a fun activity and each class is a mixture of years 3-6. I had about 24 in my art group and thought we'd attempt an ambitious project over the 3 1-hour sessions.
I came across this idea on this website. It has step-by-step instructions and a helpful video tutorial too if any of you want to attempt it at home over the holidays!
Each child could choose one letter (most went for their first initial) and over the 3 weeks we planned, created the structure and then finally decorated.
Here are some photos of the overall process:
These were so much fun and it was great to see some of the older children help those in younger year groups. These were a huge success and definitely attracted the most attention in the art gallery. I will definitely be doing these again next year for the art activity afternoons.
DB.
I came across this idea on this website. It has step-by-step instructions and a helpful video tutorial too if any of you want to attempt it at home over the holidays!
Each child could choose one letter (most went for their first initial) and over the 3 weeks we planned, created the structure and then finally decorated.
Here are some photos of the overall process:
These were so much fun and it was great to see some of the older children help those in younger year groups. These were a huge success and definitely attracted the most attention in the art gallery. I will definitely be doing these again next year for the art activity afternoons.
DB.
Art club project #5- Klimt Tree Scratch Art
This was our last project and it took a couple of hour sessions to complete. I came across this project on another great blog and wanted to give it a go. The first stage was to cover our paper with a huge range of colour and organic shapes using a wax crayon. When the page was filled with solid colour we painted over the page with black tempera paint with a few drops of washing up liquid (this helps the scratching process when it's dry).
We looked at Klimt's "Tree of Life" and used that as inspiration to create our own.
We learnt how to draw basic trees by first creating a 'Y' shape and practised these on scrap paper. We then did a rough drawing lightly on our home-made scratch paper and used a mixture of compasses/tooth-picks/skewers to scratch over the pencil. Some children had create difficulty getting their colour to shine through. This may have been because their layer of paint was too thick or perhaps not enough washing up liquid was used. However, many pieces of work came out bea
utifully and they really come to life when held up next to a window.
They're so beautiful and it's a great project to do that isn't too tricky.
DB.
We looked at Klimt's "Tree of Life" and used that as inspiration to create our own.
We learnt how to draw basic trees by first creating a 'Y' shape and practised these on scrap paper. We then did a rough drawing lightly on our home-made scratch paper and used a mixture of compasses/tooth-picks/skewers to scratch over the pencil. Some children had create difficulty getting their colour to shine through. This may have been because their layer of paint was too thick or perhaps not enough washing up liquid was used. However, many pieces of work came out bea
utifully and they really come to life when held up next to a window.
They're so beautiful and it's a great project to do that isn't too tricky.
DB.
Subscribe to:
Posts (Atom)